The Oyster Dome hike, near Bellingham, Washington, combines some of the best things about the Pacific Northwest- lush coastal forests, ocean breezes, and panoramic views of a gorgeous bay, dotted with the faraway San Juan Islands. So if you’re looking for one of the best hikes near Bellingham (or one that’s not too far from Seattle), look no further- here’s everything you need to know about the Oyster Dome Hike.
This post may contain affiliate links. If you make a purchase through them, we may receive a small commission, for which we are extremely grateful, at no extra cost to you.
")
Pssst…. looking for another awesome hike near Bellingham? Check out Fragrance Lake, less than five miles north of Oyster Dome!
About Oyster Dome Hike
Length: 7.3 miles (or just 4.7 miles if you’re departing from the Samish Overlook trailhead. More on that below!)
Elevation gain: 1,879 ft
Difficulty: Moderate to challenging
Dogs: Yes, on a leash

How to Get to the Oyster Dome Hike
There’s two trailheads to get to Oyster Dome:
- The most popular one is located here, along Chuckanut Drive in Bow, Washington. There’s no official parking lot here, so most folks park along the western edge of the southbound road.
Be super careful when parking here. Chuckanut Drive is a narrow, two-lane state highway that winds along the coastline (“Oyster Dome” was so named due to the prevalence of oyster fishing in the nearby Samish Bay)- so any vehicles that are on or near the white line that demarcates the road are at risk of being towed- or hit by other cars.
The shoulder itself is also quite narrow, given that its western edge is basically a steep drop-off to the coastline below. So… like I said, be careful while parking!

- You can also start from the Samish Overlook parking area, located here (which requires a Discover Pass). To access this trailhead, you’ll need to take several backroads, including about four miles of the unpaved Blanchard Hill Trail Road, which is poorly maintained, at best. A high clearance vehicle would be best, but most passenger vehicles (driving slowly and carefully!) should be able to make it.
Once you reach the parking lot, you’ll find space for about 20 cars, vault toilets, some picnic tables, incredible ocean views- and even a launchpad where you can watch hang-gliders take off when the wind is blowing just right. This spot’s got it all!

Despite the gnarly road, I’d highly recommend using the Samish Overlook parking lot as your trailhead. While you’ll shave off several switchbacks and over 2 miles of the trail (which, I suppose, could be a good thing, depending on how you look at it!) by parking here, you avoid the frequent car break-ins for those parked along Chuckanut Drive. In fact, my husband, Justin, and I have hiked Oyster Dome a number of times- and found so much broken glass along Chuckanut Drive the last time we stopped, we didn’t feel comfortable parking our car there- so found another nearby trail instead.
If you do decide to park along Chuckanut Drive, I’d recommend trying to park near The Oyster Bar (but not in spots reserved for their customers- let’s not be jerks, guys) to somewhat mitigate the risk of someone breaking in your car- and not leaving anything of value in it.
When to Hike the Oyster Dome Trail
One of the best things about Oyster Dome is that, due to its proximity to the coast, the temperature is pretty moderate year round. This makes it the perfect trail to hike during winter or spring in Washington, when a lot of high elevation trails are covered in snow.
That being said, from around December through February, there’s a chance of running into some snow, especially along the higher elevations of the trail. So if you’re visiting the Oyster Dome hike during that time frame, I’d recommend checking AllTrails for recent trail reports and, if there are reports of snow, throwing microspikes and some trekking poles in your backpack.

What to Expect Along the Oyster Dome Hike
Assuming you use the Chuckanut Drive trailhead (for those of you starting at the Samish Overlook, you can skip to the third paragraph below, where you’ll be joining up with the trail), you’ll start along the PNW Trail into the endlessly green forest and immediately start climbing up switchbacks.
One of the best things about this trail is that, while the incline seems unrelenting at times, it’s also incredibly consistent throughout the hike- so you’ll know what you’re in for right off the bat! As you go deeper and deeper in the forest, the sound of traffic will fade away, leaving nothing but the cathedral of second-growth Douglas fir, maple, and cedar towering overhead.

Along the fourth switchback, a little over a mile in, there’s a bench that overlooks a clearing, with spectacular views of Samish Bay- just a hint of what’s waiting for you at the top of the hike. Once you’ve caught your breath, keep on hiking northward, as the trail continues to climb up Blanchard Mountain.
About 0.4 miles after that clearing, you’ll run into the junction where hikers departing from the Samish Overlook join up with the trail (these hikers will take a 0.4 mile portion of the PNW Trail to reach this junction).

From here, the trail turns into the Samish Bay Connector, where artifacts from the logging that pervaded this area in the late 1800s to the early 1900s becomes more and more evident. There are some ENORMOUS stumps left behind from this logging (and, if you look hard enough, even some logging cables)- it would have been incredible to see this entire area as an old-growth forest!
As you continue to climb, keep your eyes and ears peeled- this forest is an excellent place to hear woodpeckers (I’m pretty sure I’ve heard one every single time I’ve hiked here) and come summer, this portion of the trail has plentiful huckleberries. You’ll continue to zig-zag up the mountain, and around 2.5 miles in, you’ll start seeing some ENORMOUS boulders, which, due to their massive scale, could have only made their way here by a glacier, millions of years ago.

Just 0.1 miles later, you’ll run into a junction- the right will lead you to the lovely Lily and Lizard Lakes, but today, we’ll be taking the left, finally on to the official Oyster Dome Trail.
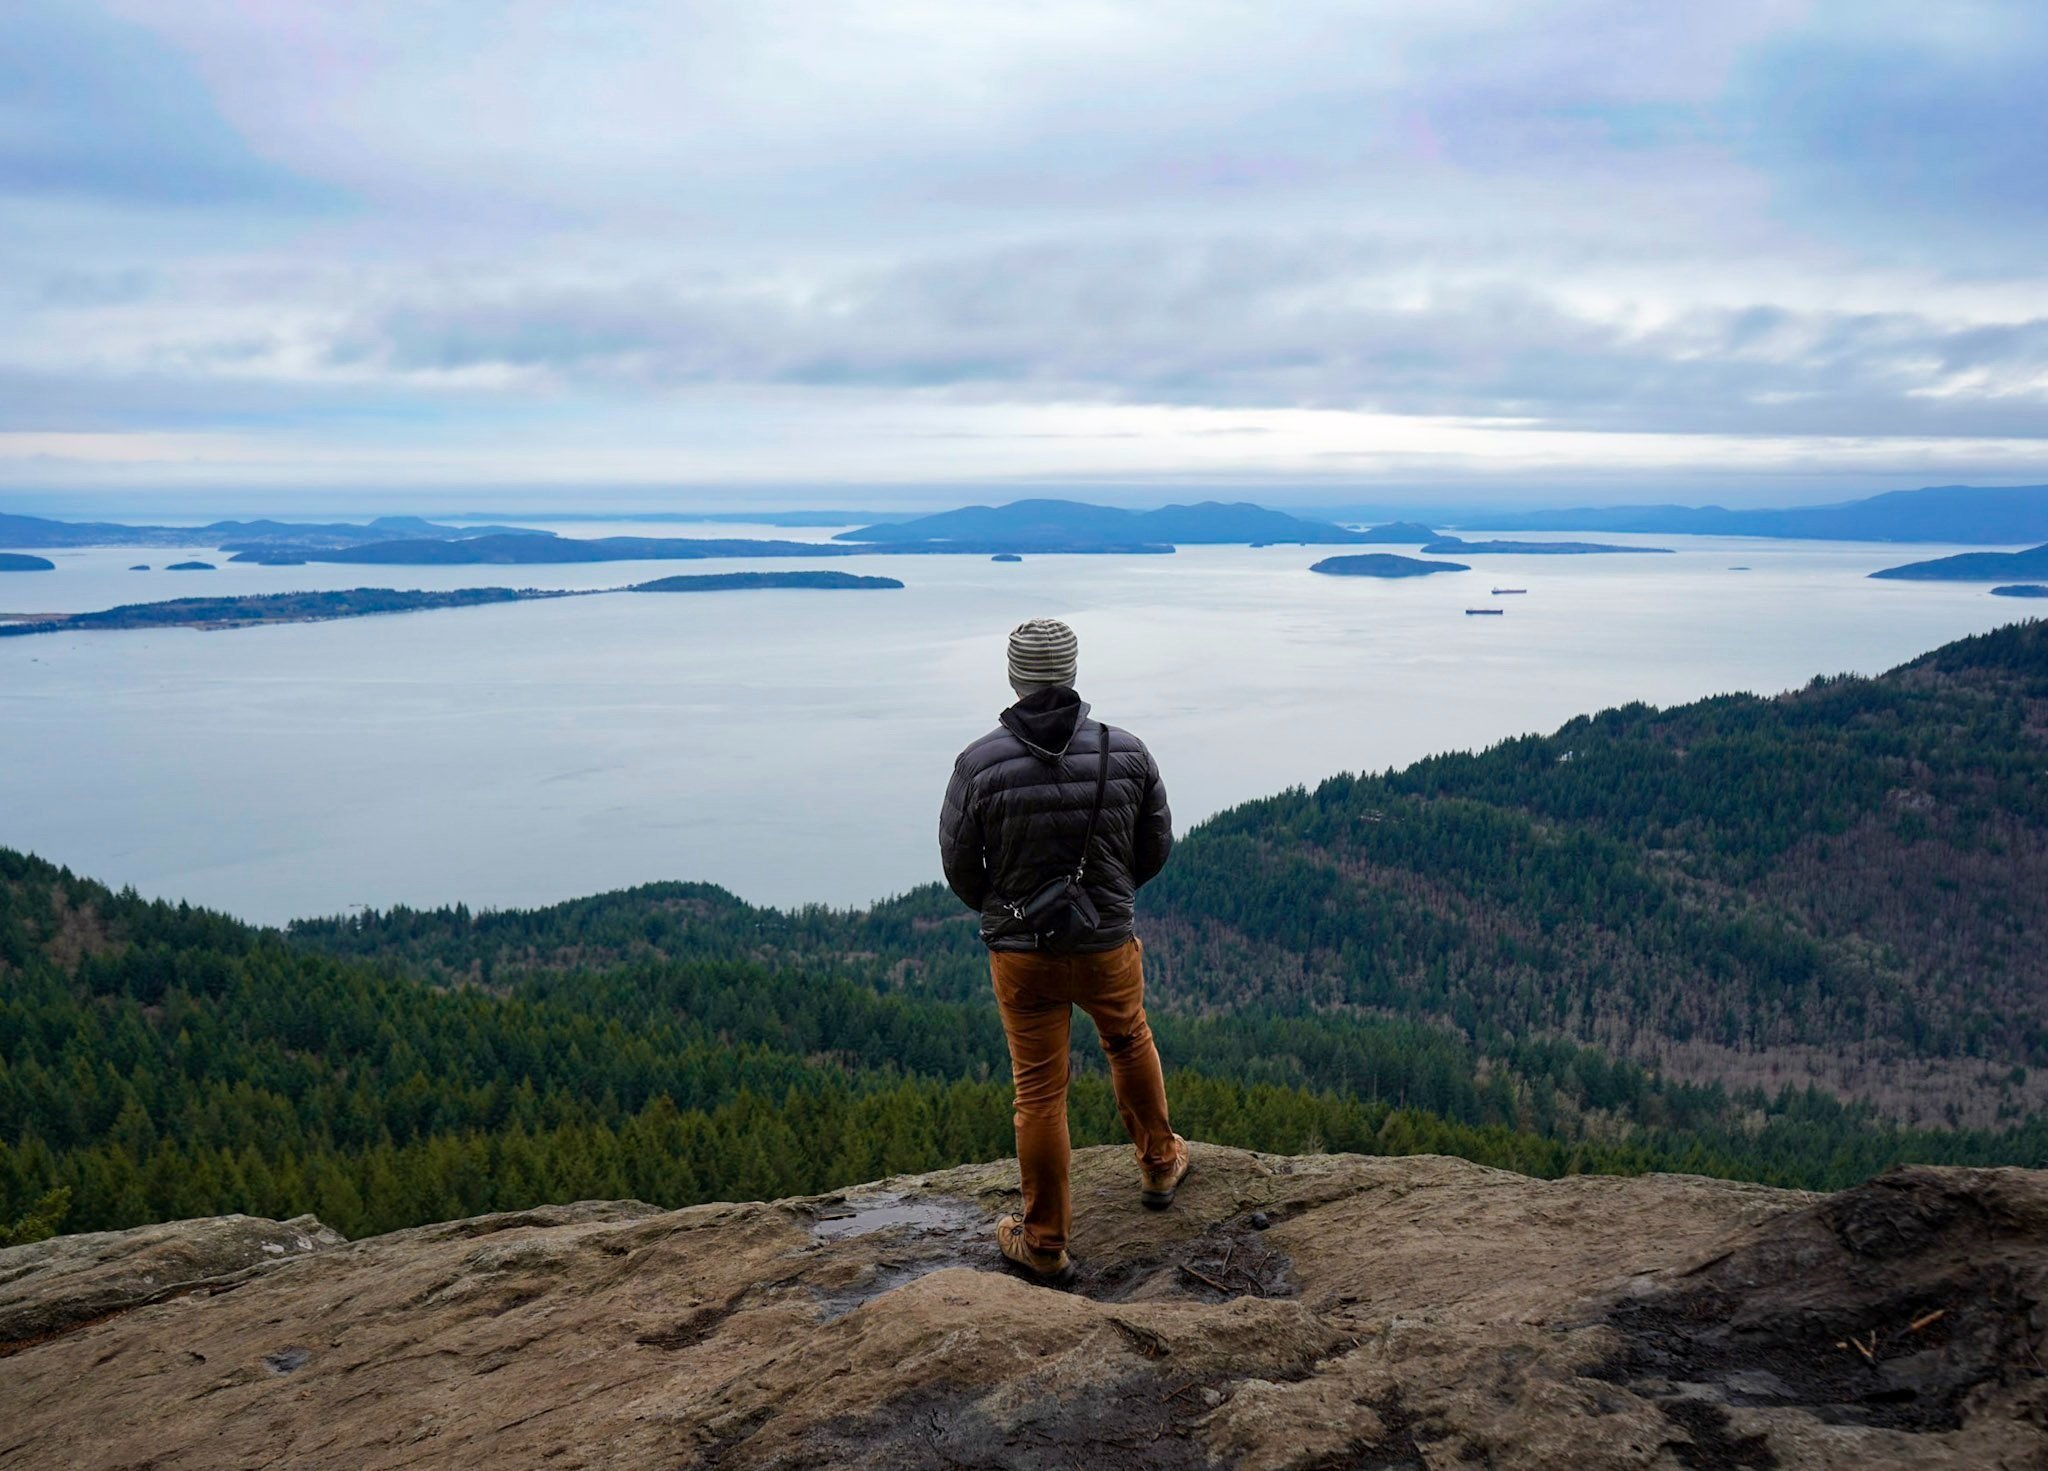
There’s one final push to the top and you’ll officially make it to Oyster Dome, a rocky outcropping on the western side of the mountain and overlooking the beautiful pine tree forest below and beyond, Samish Bay, the San Juan Islands, and, on a clear day, even Vancouver Island! This is an excellent place to have lunch or take a breather- just mind the steep drop-offs (nothing ruins lunch quite like falling off a cliff!).

Tips for the Oyster Dome Trail
- Want more of a work-out? There’s several additional extensions you can take from the Oyster Dome trail- consider the North Butte trail for awesome views of Mount Baker or Lily and Lizard Lakes.
- Given the hike’s spectacular views, year round accessibility, and proximity to both Seattle and Bellingham, it’s quite popular. So if you want to snag a spot in the Samish Overlook parking lot, especially if you’re visiting on a weekend, I’d recommend getting here early to beat the crowds.

- Oyster Dome would be a spectacular place to watch sunset- however, the Samish Overlook parking lot is gated every night. So, if you’re going to do a sunset hike here, consider using the Chuckanut Drive trailhead instead (unless you want to get a ticket- and locked in- for the evening).
- This trail is really well maintained, but there’s basically about a bajillion rocks and roots in cahoots to trip you while you hike. As such, I’d recommend wearing waterproof (cuz, c’mon, we’re in the Pacific Northwest, y’all!) hiking boots (like these for men and these for women), which will protect your feet better from all of the things trying to trip you and provide better traction on any of the more slippery parts of the trail.
Now, go forth and take on the Oyster Dome hike! Do you have any questions about the trail? Sound off in the comments below!
Thank you for reading our post! Check out our latest stories here and follow us on Instagram (@UprootedTraveler), YouTube, or on Facebook to see what we’re up to next!

How long does the Hike take from the Samish Overlook parking lot? We have 3 kiddos in tow (11, 9 and 3) Do you think it’ll be ok for them? I saw it takes about 4 hours (back and forth) from Chuckanut Drive trailhead (which would be too much for them! Lol) so hoping from Samish Overlook would be better for them.
Hi Cheryl,
The hike from the Samish Overlook is 4.7 miles (you can see the AllTrails for it here- https://tidd.ly/3VAN98I), whereas the hike from Chuckanut Drive, is 7.3 miles. I’d estimate that the trail from the Samish Overlook would take about two and a half hours- so definitely more kid-friendly than the longer version.
Thanks for reading and good luck!
Jess