Looking for some awesome hikes in Sedona? Lucky for you, there’s tons of amazing trails to get up close and personal with the city’s iconic red rocks and Ponderosa pine tree forests. Over the past few years, I’ve spent over a month in Sedona, lacing up my hiking boots and scoping out the very best trails it has to offer.
So if you’re looking for everything you need to know about some of the most epic hikes in Sedona, from parking, fees, and even hidden caves along the trails, keep on reading this post!
This post may contain affiliate links. If you make a purchase through them, we may receive a small commission, for which we are extremely grateful, at no extra cost to you.

")
Getting to trailheads in Sedona
Before we dive in, I wanted to note that Sedona is, deservedly, a popular destination with visitors—and accordingly, parking at trailheads (and, really, most places in town) can be kind of a nightmare. To help you prepare ahead a bit, I’ve outlined information about the parking situation for each of the hikes in Sedona below.

Transportation Tip
Sedona Shuttle, the City of Sedona’s public transit, has seriously improved its service in recent years, including:
1. Sedona Shuttle – a FREE service running Thursday-Sunday, taking riders from free designated parking lots to the city’s most popular trails.
2. Sedona Shuttle CONNECT – an app-based, on-demand service running from Thursday-Sunday for only $2 per rider ($1 for seniors) that usually arrives within 15 minutes!
3. Verde Shuttle – a hop-on/hop-off bus with hourly service that links central Cottonwood and Sedona, 7 days-a-week
Check the link above for expanded service calendar and specific service hours.
Okay, with that context in mind, let’s get to the trails!

Easy hikes in Sedona
1. Birthing Cave
Length
2.0 miles
Elevation Gain
291 feet
Difficulty
Easy

Fees
None
Good for
Hikers of all skill level, families, and photography enthusiasts

Parking
There’s a handful of spots at the trailhead itself and also some spots where you can park along Long Canyon Road north of the trailhead.
For whatever reason, this trail seems to be a bit more under-the-radar than some other hikes in Sedona (for now anyway!), so you have a pretty decent chance of finding parking here. Like all the hikes in Sedona, though, if you’re visiting during the busy season (March through June and September through October), you may want to arrive fairly early to ensure you snag a spot.
When to visit
Sunrise or sunset

What to Expect along the Birthing Cave Trail
This trail is seriously one of the best bang-for-your-buck hikes I’ve done- EVER!
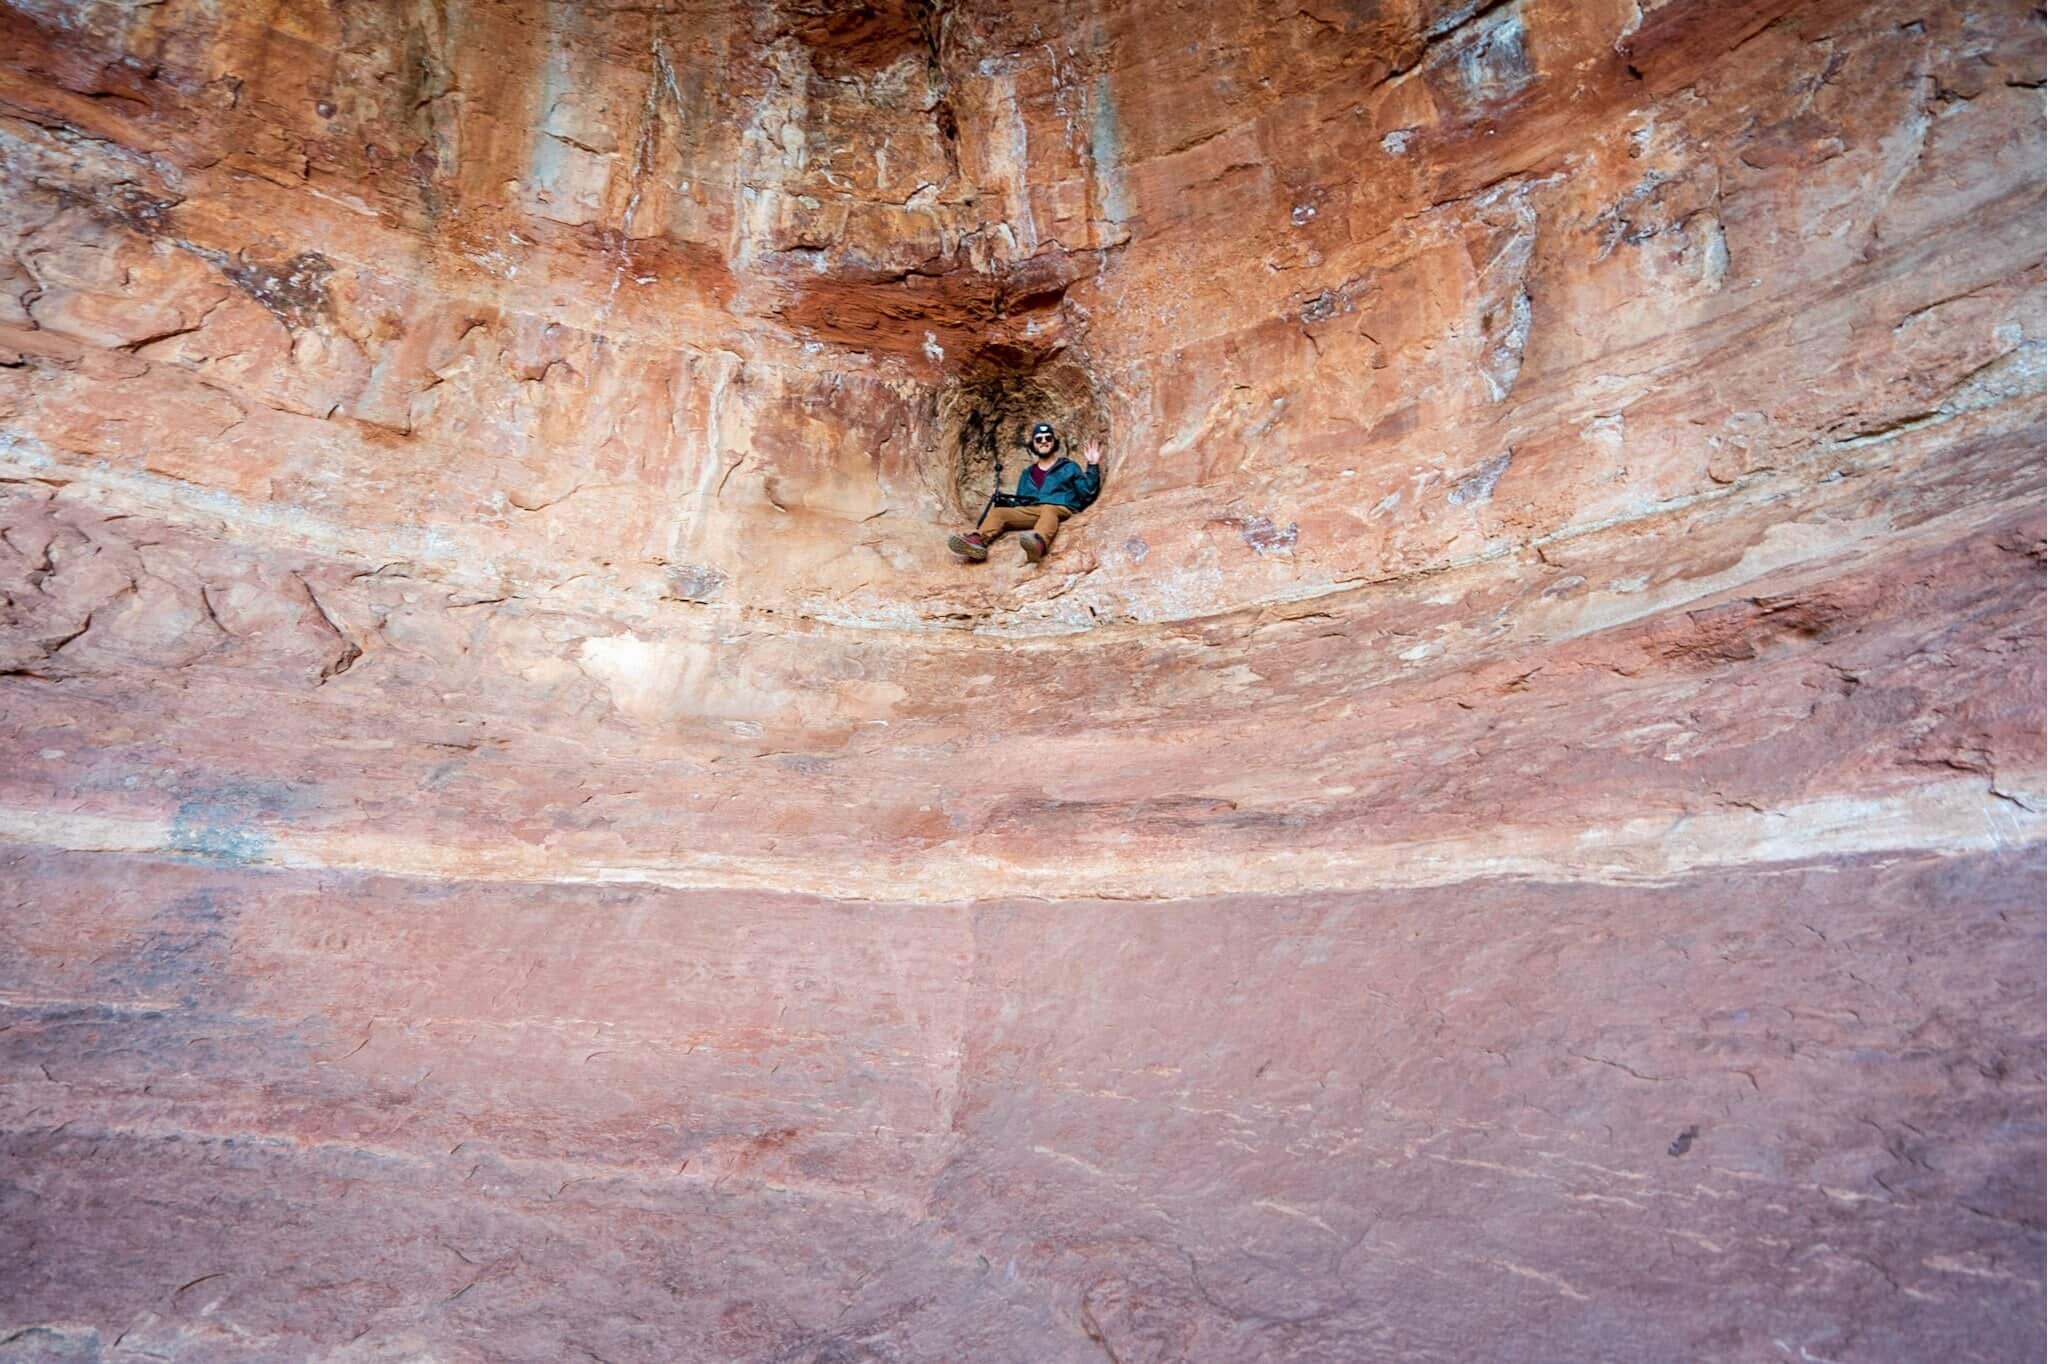
After a short, relatively flat one-mile hike out, you’ll climb up a short incline to reach one of the coolest Sedona caves, a tall and narrow cavern that’s located on the edge of a cliff, overlooking the ponderosa pine forests and the surrounding gorgeous red rocks.
If you’re anything like me, you’ll have a blast climbing around the cave- see if you can reach the little “belly button” indentation in the middle of the cave’s walls, which is the best spot to take photos of the cave and its spectacular vista.
Tips for the Birthing Cave Trail
Come prepared to navigate a bit
The trail is not well-marked and can be a bit challenging to follow. To help you on your quest to find it, I wrote an entire blog post on how to get to the Birthing Cave. I’d also recommend downloading the trail map on AllTrails ahead of time so you can follow along with your GPS and, hopefully, not get lost!
If you’re a photographer, bring a wide angle lens
The entrance to the cave is HUGE. If you want to capture some sweet pictures of it in its entirety, you’re going to need a wide angle lens. The photo above was captured with a Sony a7III, coupled with a Sony 16-35mm Vario-Tessar lens (definitely a wide angle lens), and still, it was no match for the girth of the cave (this photo was stitched together from multiple pictures).

Bottom line: if you want a photo capturing the entirety of the cave, the wider angle the lens, the better.
2. Bell Rock Loop
Length
3.9 miles
Elevation gain
357 feet
Difficulty
Easy

Fees
Red Rock Pass or America the Beautiful Pass
Good for
Families, photographers, and those looking for one of the most allegedly “powerful” vortex hikes in Sedona
Parking
There is a main lot for the Bell Rock trailhead, north of the loop trail, that’s fairly small (holding about 20 cars). Justin and I headed here around 6 pm on a weekday and the lot was completely full, with plenty of cars circling around, vulturing for a spot.

If this lot’s full, you can try parking at the Courthouse Loop South trailhead (if you plan on hiking the full loop, you’ll just be starting at the southern end of it) or, alternatively, in the Yavapai Vista Point trailhead, about a ten-minute walk north of the Bell Rock trailhead (if you’re mainly interested in hiking to and scrambling up Bell Rock, this is a great parking option).
When to visit
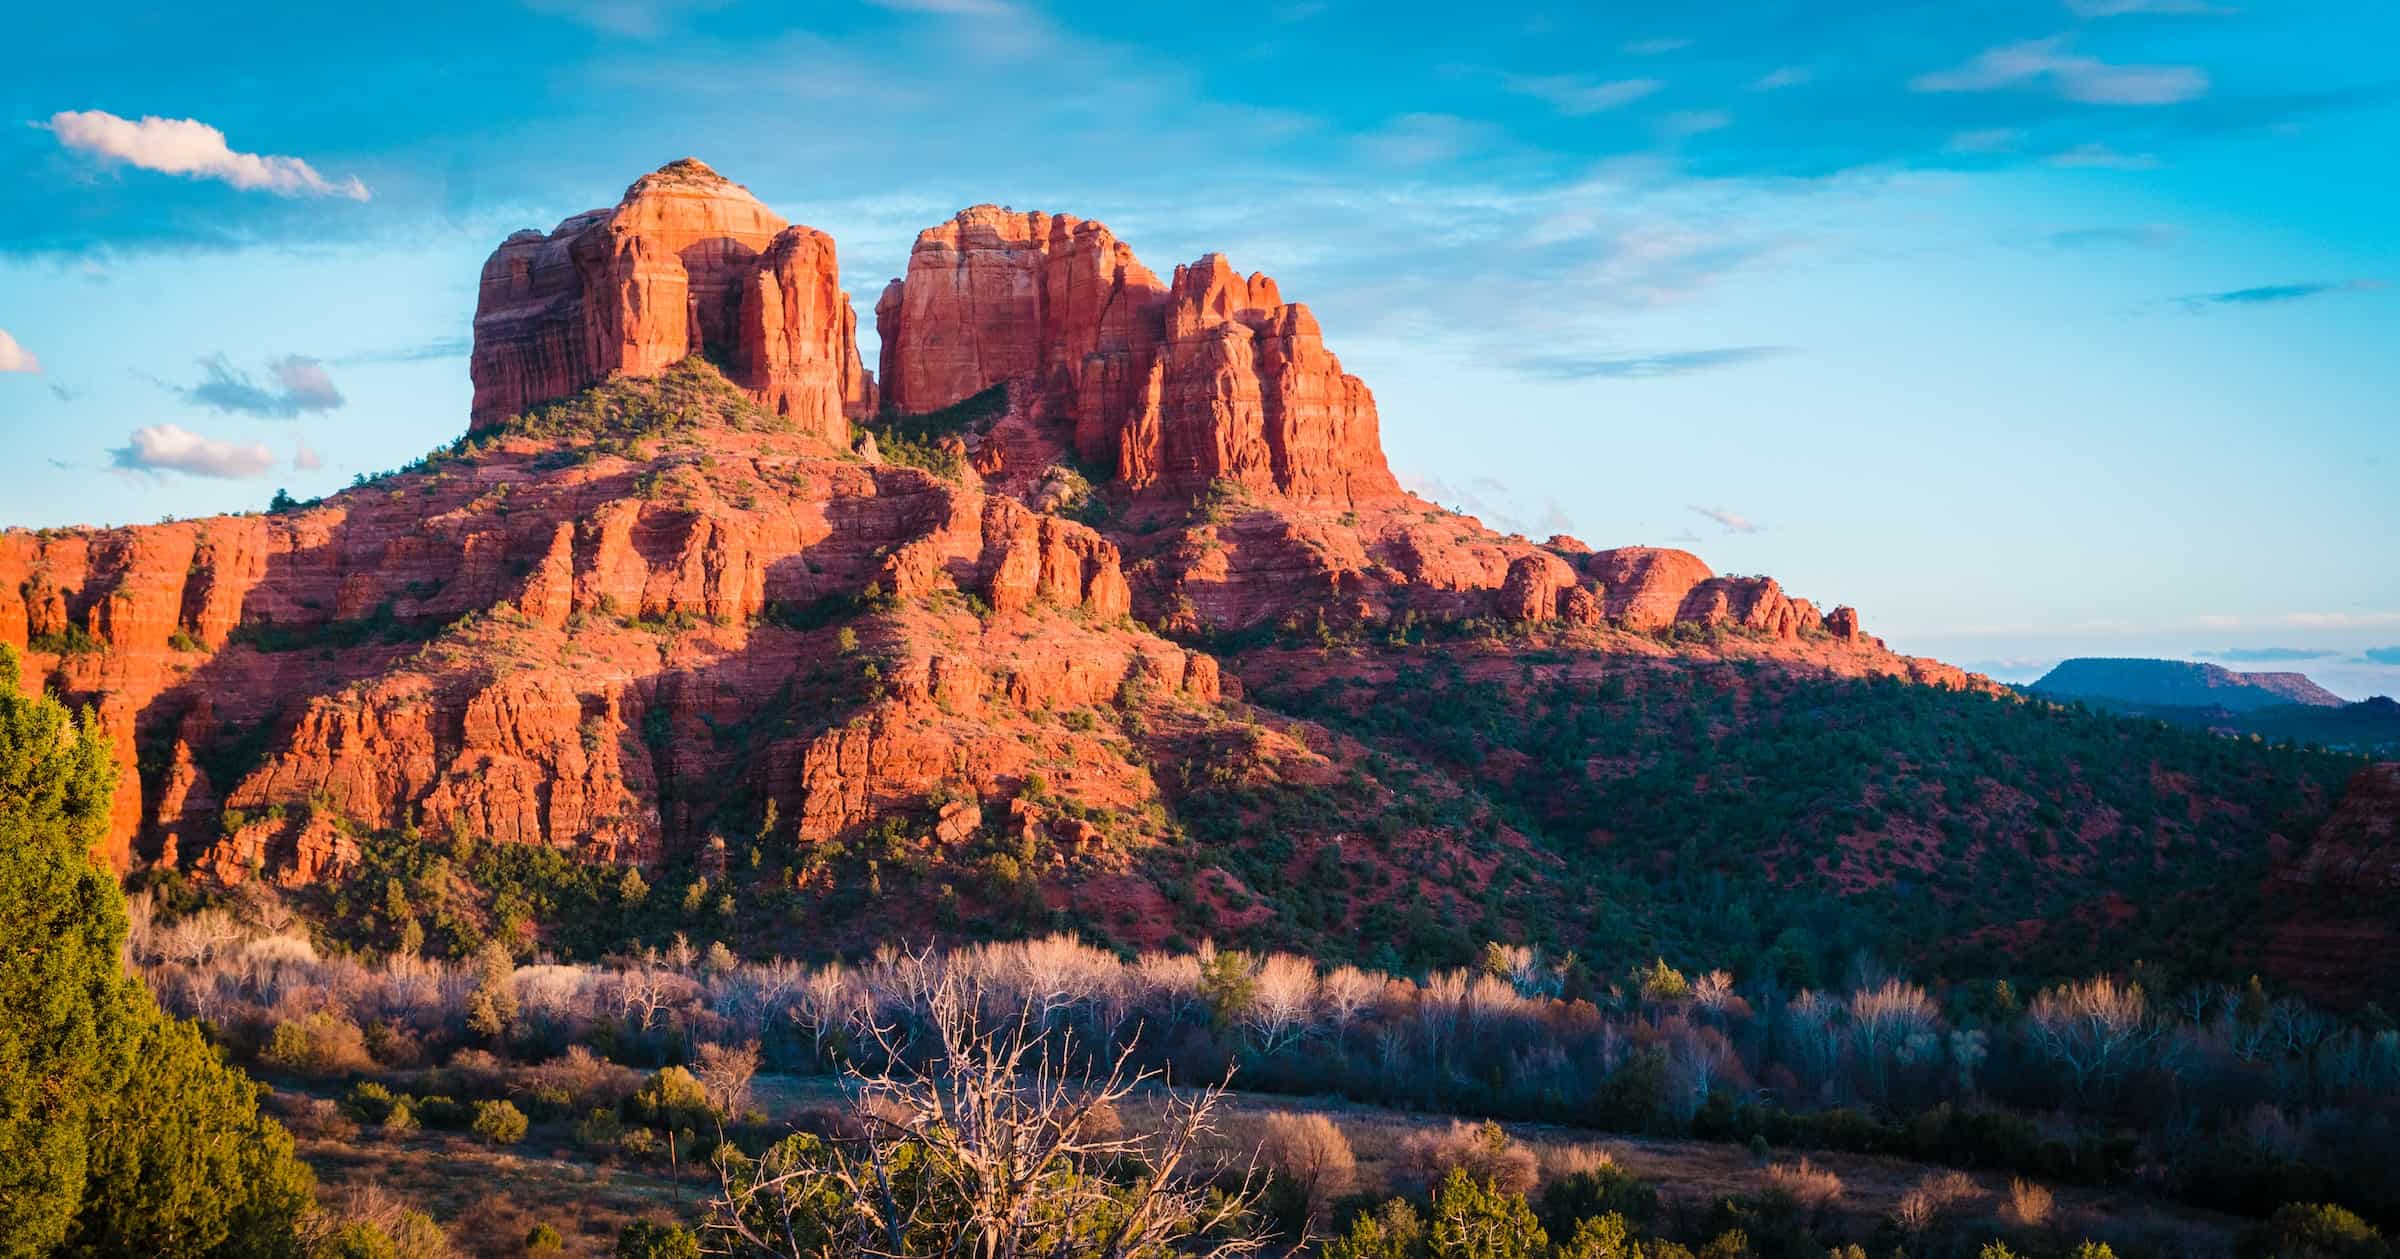
The colors of the rocks here look absolutely spectacular at sunrise.
What to expect along the Bell Rock Loop
This hike is a large, mostly flat loop around Bell Rock, allegedly one of the strongest energy vortexes in Sedona (don’t be surprised to see folks meditating along the trail- we saw several!), and Courthouse Butte.
The trail ends with a scramble up Bell Rock, which is definitely a highlight. You’ll get absolutely fantastic views from the higher vantage point, making this a great alternative for hikers who may not yet be ready for Cathedral Rock, but still want some experiencing with scrambling.

Tips for the Bell Rock
Download the map on AllTrails ahead of time
While there’s plenty of trail signs to help you find your way along the entire loop, the trail names change often a LOT and are not always super intuitive.
For example, if you’re starting the trail from the northern parking lot and turn left, you’ll follow signs to Bell Rock Access Trail → Bell Rock Trail → Llama Trail → Courthouse Butte Loop Trail → Big Park Loop → Bell Rock Pathway → Bell Rock Climb → Bell Rock Access Trail. Easy peasy, right?

Accordingly, I’d recommend downloading the trail map on AllTrails ahead of time, so that you can follow along with GPS on the trail so you don’t get turned around.
If all else fails, so long as you keep both Bell Rock and Courthouse Butte to your right hand side, you should be moving in the right direction!
Follow the wire baskets during the scramble
It’s a bit challenging to figure out the correct path to scramble up Bell Rock, but there’s actually both signs and wire baskets full of red rocks (higher up on Bell Rock) that are meant to help you find the path. The wire baskets will eventually peter out, but you can keep climbing up Bell Rock as far as you’d like, finding your own pathway.

I’d recommend having shoes with decent traction for the climb, as the rock is quite slick and often has steep drop-offs. I use this pair of hiking boots for most hikes with rugged terrain (these are the ones that Justin uses) and these hiking sandals for easier trails (here’s the kind Justin uses).
Watch out for mountain bikers
This is a popular spot for mountain bikers, so keep your eyes peeled and ears open so you can jump out of their way, if needed.
3. Sugar Loaf Loop Trail
Length
1.9 miles
Elevation gain
354 feet
Difficulty
Easy

Fees
None
Good for
Beginner hikers and families
Parking
There’s not an official parking lot for the trailhead, which starts in a residential neighborhood. Some of the streets around the trailhead allow parking (be sure to be super careful about checking for signs).

When to visit
During sunrise, you can actually watch the sun eclipse Sugar Loaf Mountain, an absolutely breathtaking sight!
What to expect along the Sugarloaf Loop Trail
If you’re looking for uncrowded and easy hikes in Sedona that are centrally located (I could literally walk to this trailhead from one of the Airbnbs I stayed in!), this trail is a fantastic option.

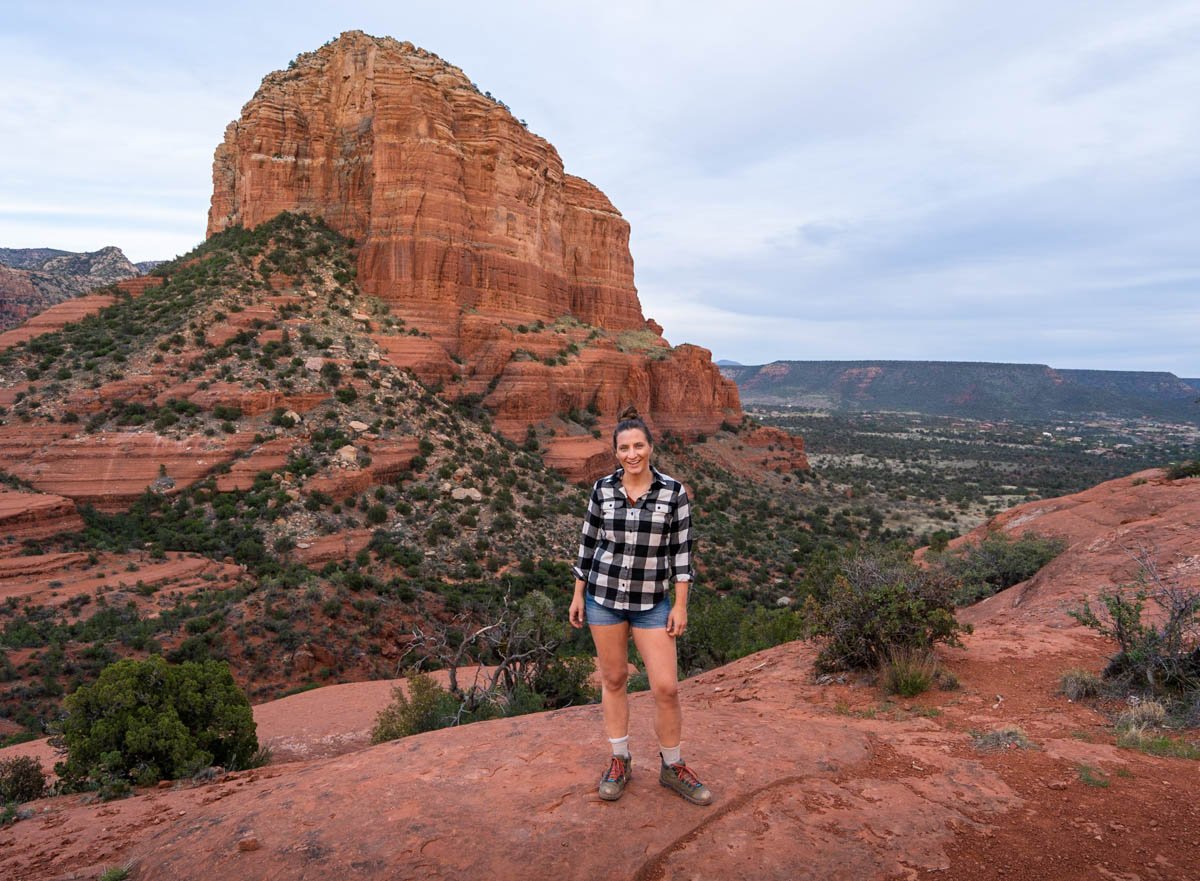
Follow the cairns, which will lead you through juniper trees and prickly pear cacti and up the 250-foot tall Sugar Loaf Butte, which overlooks some of the most-beloved red rock formations in Sedona, with close-up views of Coffee Pot Rock and, in the distance, Courthouse Butte, Bell Rock, and Castle Rock.
Tips for the Sugarloaf Loop Trail
Keep an eye out for javelinas
Javelinas, a pig-like animal endemic to Sedona, are frequently found along this trail. Javelinas, in rare instances, have attacked and wounded humans and their pets- you can minimize your risk of a bad javelina encounter by not feeding or otherwise getting within 20 feet of it.

This may not be the best choice to be one with nature
I love this hike due to its location right within the city of Sedona, but that does mean you can see houses along a significant amount of the trail. If you’re looking to just be out in the wilderness, this may not be the right hike for you.
4. Fay Canyon Trail
Length
2.6 miles
Elevation gain
383 feet
Difficulty
Easy

Fees
None
Good for
All stages of hikers
Parking
For Sedona, this trailhead has a reasonably large parking lot (as in, it fits more than, like, 14 cars), but, given the hike’s popularity, I’d still recommend coming on the earlier side to ensure you get a spot.

When to visit
I’d actually recommend visiting this one if you’re looking for something to do on a super hot day- the trail is partially shaded, which is tough to find in Sedona! It’s also a decent place to watch the sunrise.
What to expect along the Fay Canyon Trail
If you’re looking for a hike an easier trail that still offers stellar views, Fay Canyon is an excellent choice.
This mostly flat trail leads you through a forested canyon. The alligator bark juniper and oak trees will provide you blessed shade and also peekaboo glimpses of the red cliffs above.

When I first got to the end of this hike, I was a little disappointed- it looks like a rockslide is obscuring whatever “pay-off view” the trail was leading you to. Turns out, you should absolutely scramble up that rockslide, as, a little bit of height reveals breathtaking views of the rocks that form the canyon.
Tips for the Fay Canyon Trail
For more of a challenge, check out the Fay Canyon Arch
Fay Canyon has yet another secret offshoot- this time to a natural arch! If you want to see the arch, you’ll follow the trail about 0.6 miles, where you should see some cairns (those little rock piles other hikers make). Follow this path to the right for another 0.1 miles and you’ll hit the arch!
Again, the climb up here is steep, on loose, rocky terrain, and seemingly full of stabby cacti, so be sure to wear proper hiking shoes if you come here (I have these hiking boots and Justin has these)! You can actually climb on top of the arch if you follow a faint trail to the right of the structure. It can get a bit sketchy in places, though, so please know your limits!
Moderate hikes in Sedona
5. Soldier Pass Trail
Length
4.5 miles
Elevation Gain
839 feet
Difficulty
Moderate

Fees
None
Good for
Adventurous families and any hiker that’s in reasonably good shape.
Parking
Ho boy, this one can be a bit of a doozie. This hike is POPULAR and the parking lot is tiny, holding only 14 vehicles. Plus, it’s gated and only open from 8 AM to 6 PM- when my husband and I arrived at the parking lot around 7:40 AM on a Saturday, there were probably 30+ cars waiting in front of us.
There are a few spots along Forest Service 9904 Road where you can park (be sure to triple check for signs), but the surrounding fancy residential neighborhood does not permit on-street parking (and you’ll almost certainly get towed if you park there). TL;DR: get here early or you won’t get a spot.
So how did my husband, Justin, and I park?
Well, you can access the Soldier Pass trail from an alternate trailhead, Jordan Road Trailhead, which has about 25 parking spots and is a short 15 minute drive from Soldier Pass’ parking lot (if you park in this lot, you will need to purchase a Red Rock Pass ($5/day or $15/week) or have an America the Beautiful pass, either of which will let you park at a number of other awesome Sedona trails.
Leaving from the Jordan Road trailhead will add about half a mile to the total hike (you’ll follow this route, from the Cibola Pass Trail to the Jordan Trail to Soldiers Pass Trail and finally back to the trailhead via Brins Mesa Trail).
When to visit
During the warmer months, I’d recommend either starting early or later in the afternoon, as there’s limited shade along the trail and you’ll largely be exposed to the hot Arizona sun.

And if you’re wanting to see sunrise or sunset on the trail, remember that you shouldn’t park in the trailhead’s lot (unless you can somehow get in and out of the parking lot within the 8 AM to 6 PM timeframe).
What to expect along the Soldier Pass Trail
Soldier Pass is one of the most popular trails in Sedona- and for good reason!
There’s SO many neat features along this trail, like the Devil’s Sinkhole, a 150-foot wide by 50-foot deep sinkhole, created as water dissolves limestone along and under the ground’s surface, causing the ground to collapse. It keeps growing and changing every year- it might be different the next time you visit Sedona!

Another must-stop site along the way is the Seven Sacred Pools, a series of consecutive pools along a sandstone ridge. While the pools were pretty low while we visited, they can form a series of cascading waterfalls after a night of heavy rain.
In addition to all of its interesting features, the hike provides absolutely spectacular views of Sedona’s red cliffs, rising above you in the distance.
We also wrote a whole post about Soldier Pass Trail with all the information you need to know about this unmissable hike!

Tips for the Soldier Pass Trail
Don’t miss the Soldier Pass Cave
Want to check out a super cool, secret cave? OF COURSE YOU DO!
To find the Soldier Pass Cave, you’ll continue along the trail for a bit over half a mile past the Seven Sacred Pools, until you reach a fork in the road.
Here, you’ll turn right (northeast) and follow the boot trail up to an open mesa, where you’ll continue left towards the base of a cliff. Once along the mesa, you should be able to spot an archway in the cliff, where the Soldier Pass Cave is hidden.

Word of warning- the hike up to the cave is pretty steep and can take a bit of scrambling over loose rocks. Once you hoist yourself up into the cave, though, you’ll be able to explore the expansive cavern, complete with a window overlooking Sedona’s red rocks and nifty light (so much fun to play around with if you’re a photography enthusiast- although, due to the low light, you’ll likely need a slow shutter speed, so be sure to bring a tripod!).
The trek to the cave will add about a mile-round trip to the total hike- a totally worthwhile addition in my opinion!
6. Devil’s Bridge
Length
3.9 miles
Elevation gain
521 feet
Difficulty
Moderate

Fees
None
Good for
Hikers of all abilities, families (although there are some cliffs with steep drop-offs here, so keep a watchful eyes on kiddos), and Instagram enthusiasts
Parking
You have a few options for parking nearby. You can drive just a short distance down Dry Creek Road, park in the lot here, and walk to the trailhead down Dry Creek Road.
This parking lot fills up quick- Justin and I arrived at the trailhead around 7 AM and it was already full. However, unlike a lot of other hikes in Sedona, you can park along Boynton Pass Road, the main road you’ll take to reach the trailhead.

If you park here, the walk along Dry Creek Road is pretty, but you will be passed by seemingly endless Jeep tours and get dust flung in your face as they bump on by.
If you’re looking for a trail that doesn’t cause dust to be blown aggressively in your face, you can alternatively hike to the Devil’s Bridge from the Mescal trailhead (following signs for Devil’s Bridge), which adds a total of 0.3 miles to the hike. The parking lot for the Mescal trailhead tends to be less crowded and the hike to the bridge is more scenic and calm.

When to visit
The light here at sunrise is extra dreamy (plus you may get to see some hot air balloons!).

What to expect along the Devil’s Bridge Trail
If you’re like the majority of folks (including myself) and coming down Dry Creek Road, you’ll walk the trail down a mostly flat (but for the gaping potholes) road. You’re completely exposed to the sun along the trail, with no shade, but, on the bright side, you’ll have panoramic views of the surrounding red rock cliffs.
After about a mile, you’ll reach the “official” trailhead (i.e., the one by the parking lot for folks with 4WD), which leads to an area with much denser tree coverage.

The path will eventually narrow and lead up the base of a mountain. Here, you’ll need to climb up some steep, rocky stairs and even do a bit of light rock scrambling, but this section is fairly short and should be manageable for most folks in decent shape.
And good news- before you know it, you’ll be at the Devil’s Bridge, towering 54 feet above the ground and offering spectacular views of the Ponderosa pine tree forest below and beyond, Sedona’s famed glowing red rocks.
Tips for the Devil’s Bridge Trail
Prepare to wait for a photo
If you want a photo on top of the bridge, I wouldn’t visit on a day when you’re pressed for time. Although Justin and I arrived at the trailhead bright and early in the morning, there were still about fifty or so people in front of us, waiting in line to get photos on the Devil’s Bridge.

While I had hoped the experience would be more organic and a bit less like, well, Disneyland, it was still kind of fun- we talked to folks in front of us in line about their travels and cheered on other hikers as they struck goofy poses on top of the arch. We had to wait about 45 minutes to an hour to get our photo, so make sure to schedule plenty of time for your hike if you’re committed to getting that iconic pic.
It’s not as scary as it looks
I’m not the biggest fan of heights, but standing on top of the bridge was pretty manageable for me- it’s a lot wider than it looks in photos (5 feet at its narrowest)!
7. Thunder Mountain Trail
Length: 3.0 miles
Elevation gain: 360 feet
Difficulty: Easy to moderate

Good for
Hikers looking for a bit of a shade (there isn’t a ton along the trail, but certainly better than most Sedona’s trail) and hikers of all abilities
Parking
There’s a small lot for about 15 cars at the trailhead and some street parking in the surrounding residential neighborhood (as always, be careful to check for signs as to whether parking is allowed).

Fees
None
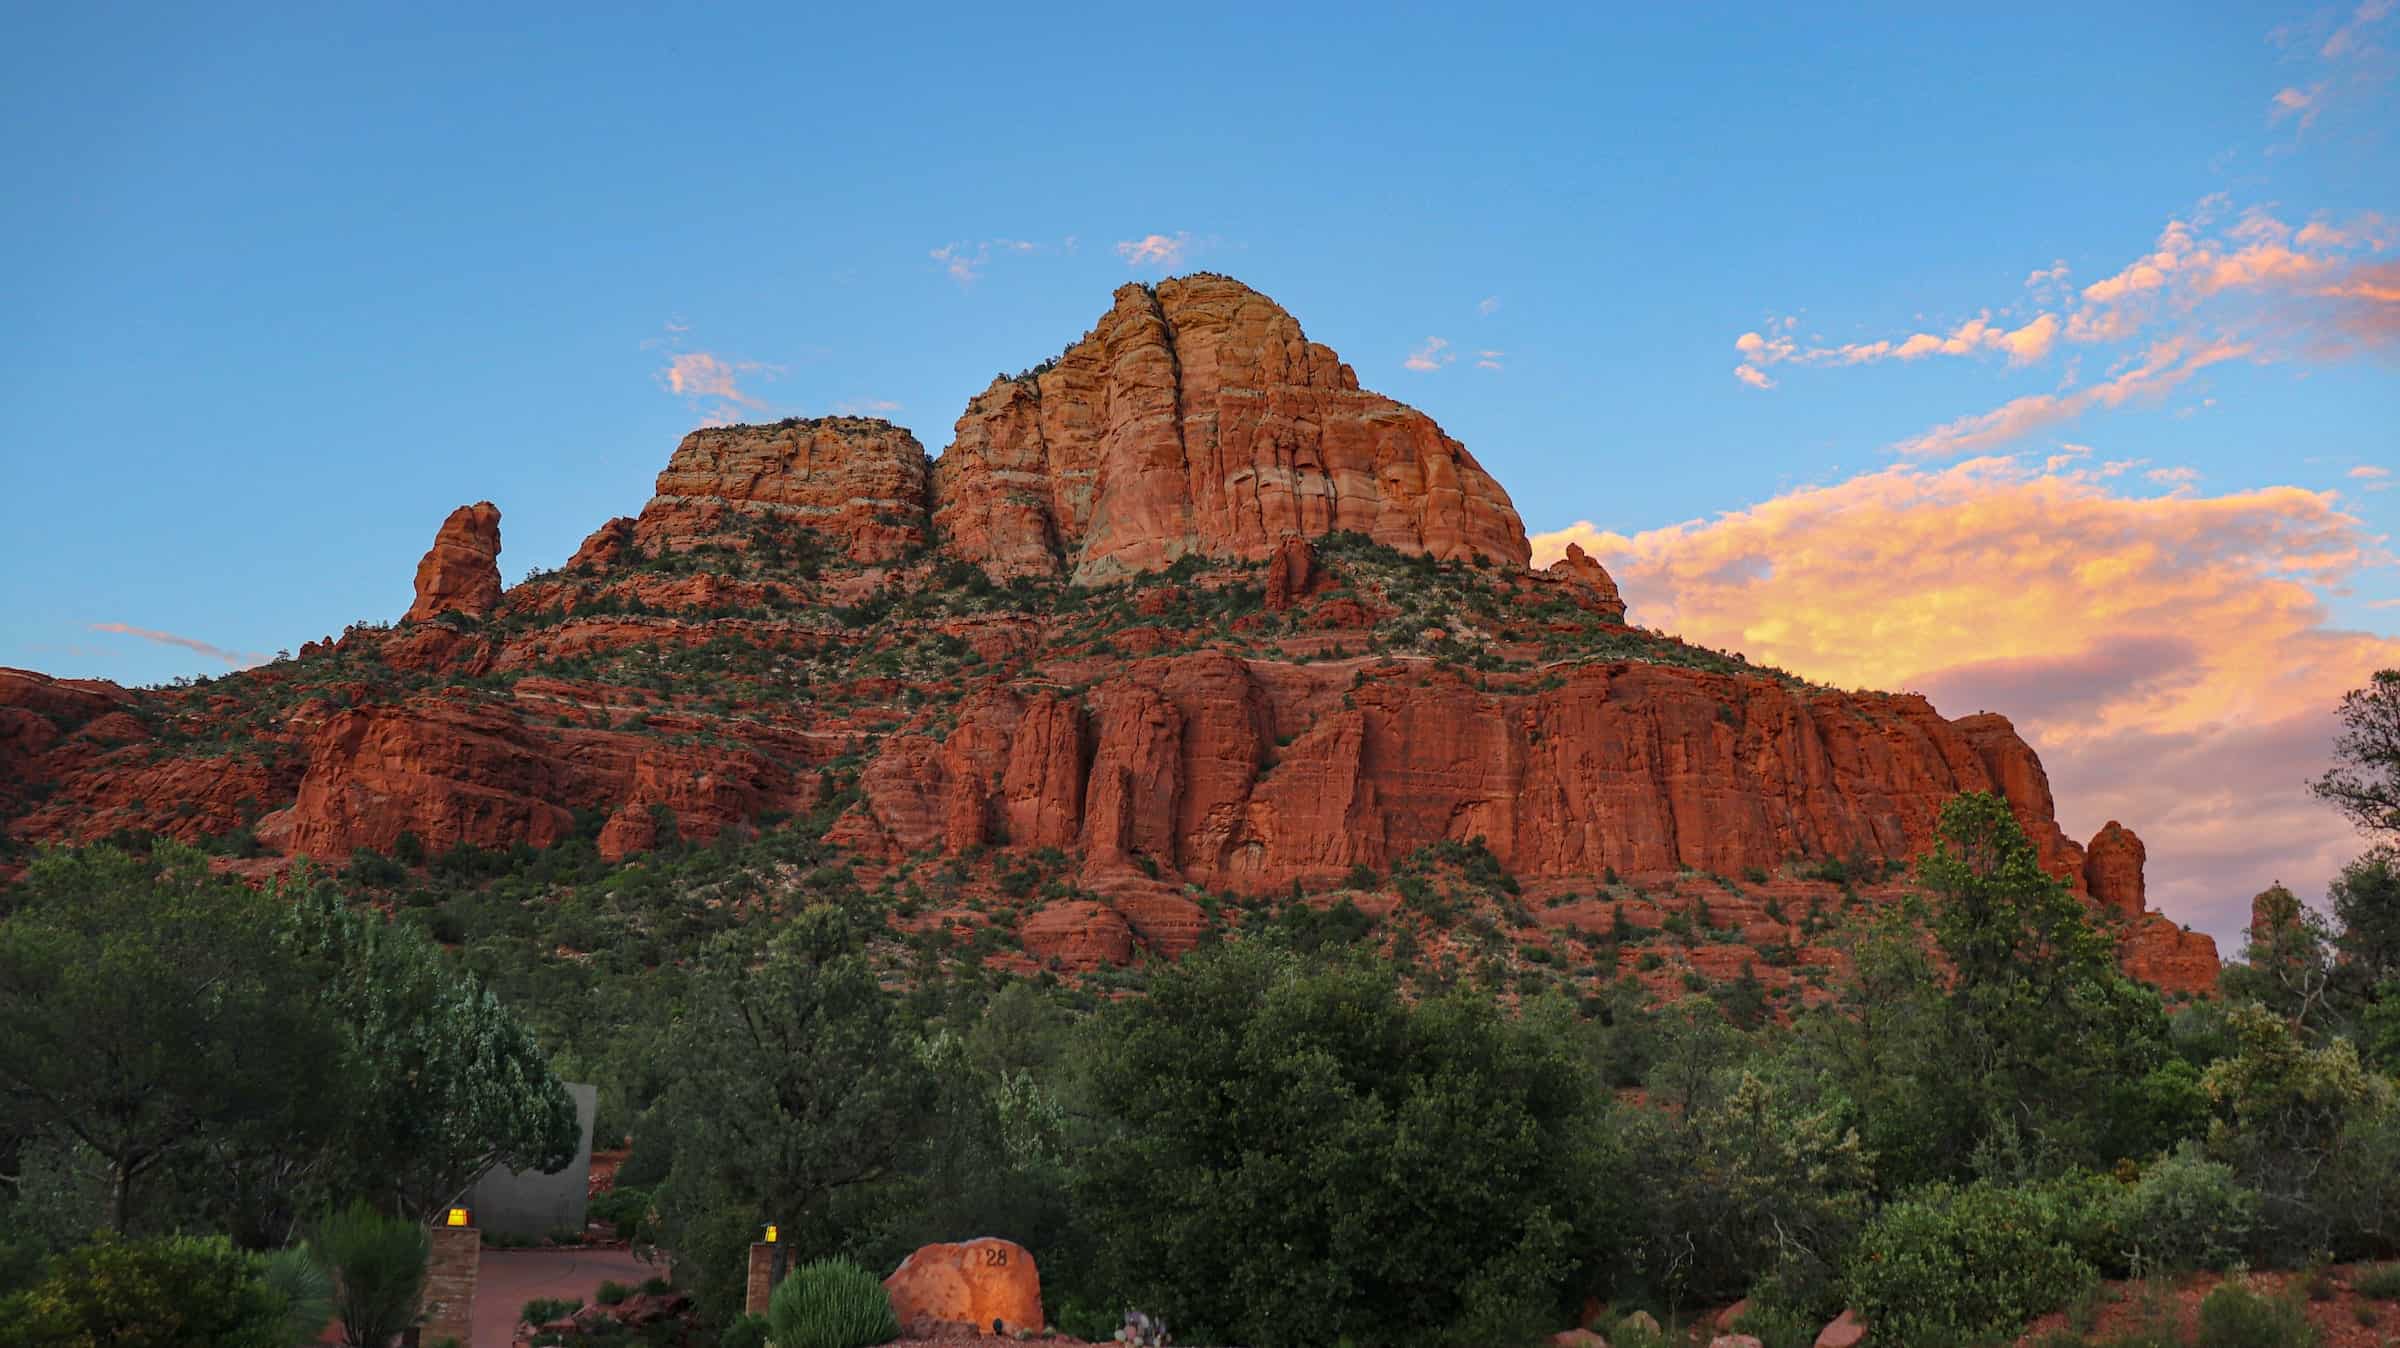
What to expect along the Thunder Mountain Trail
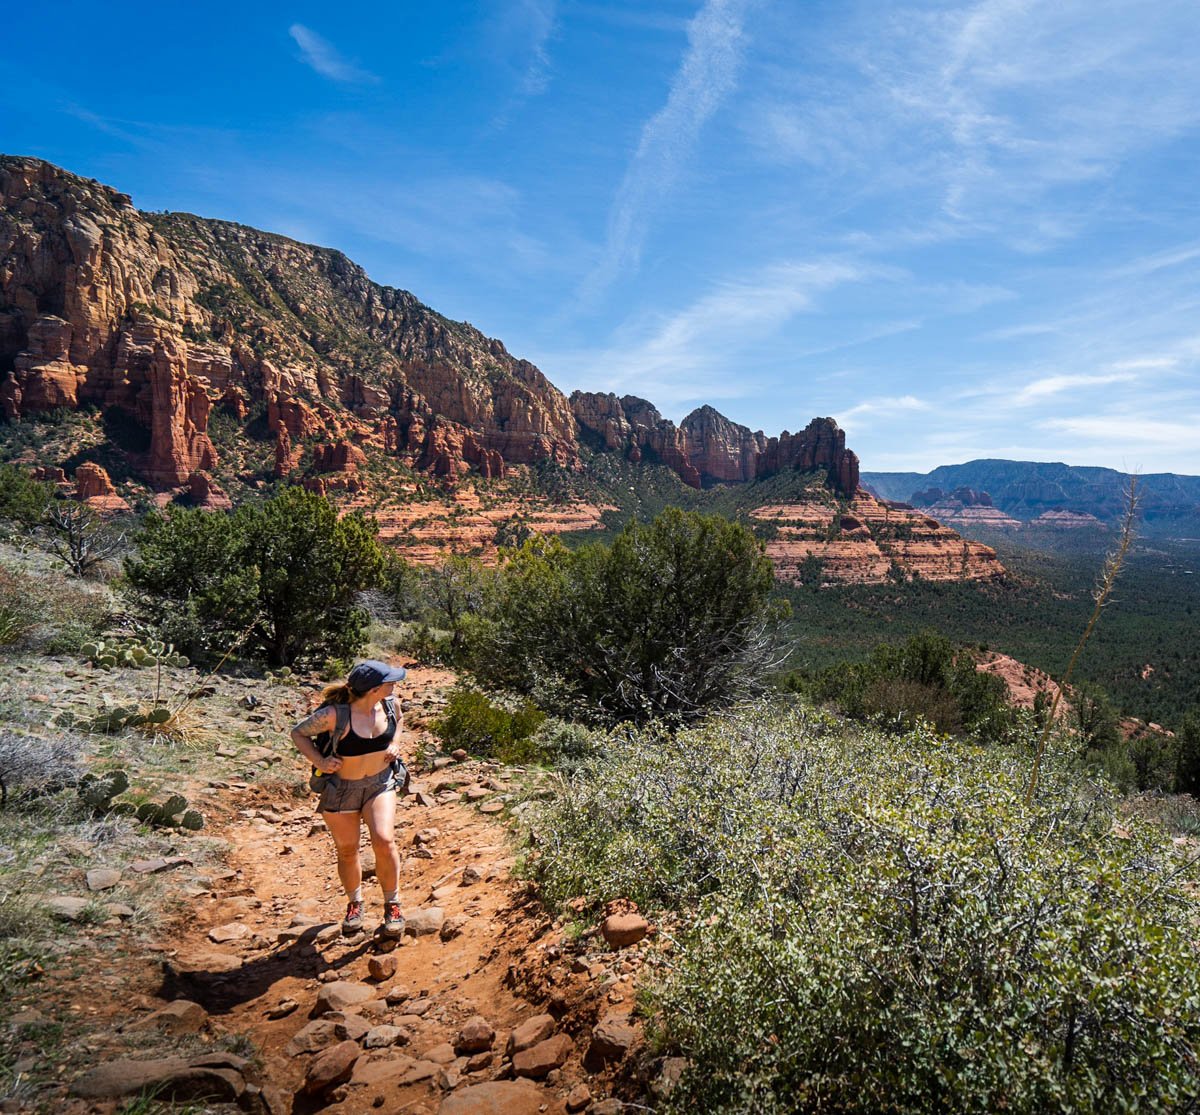
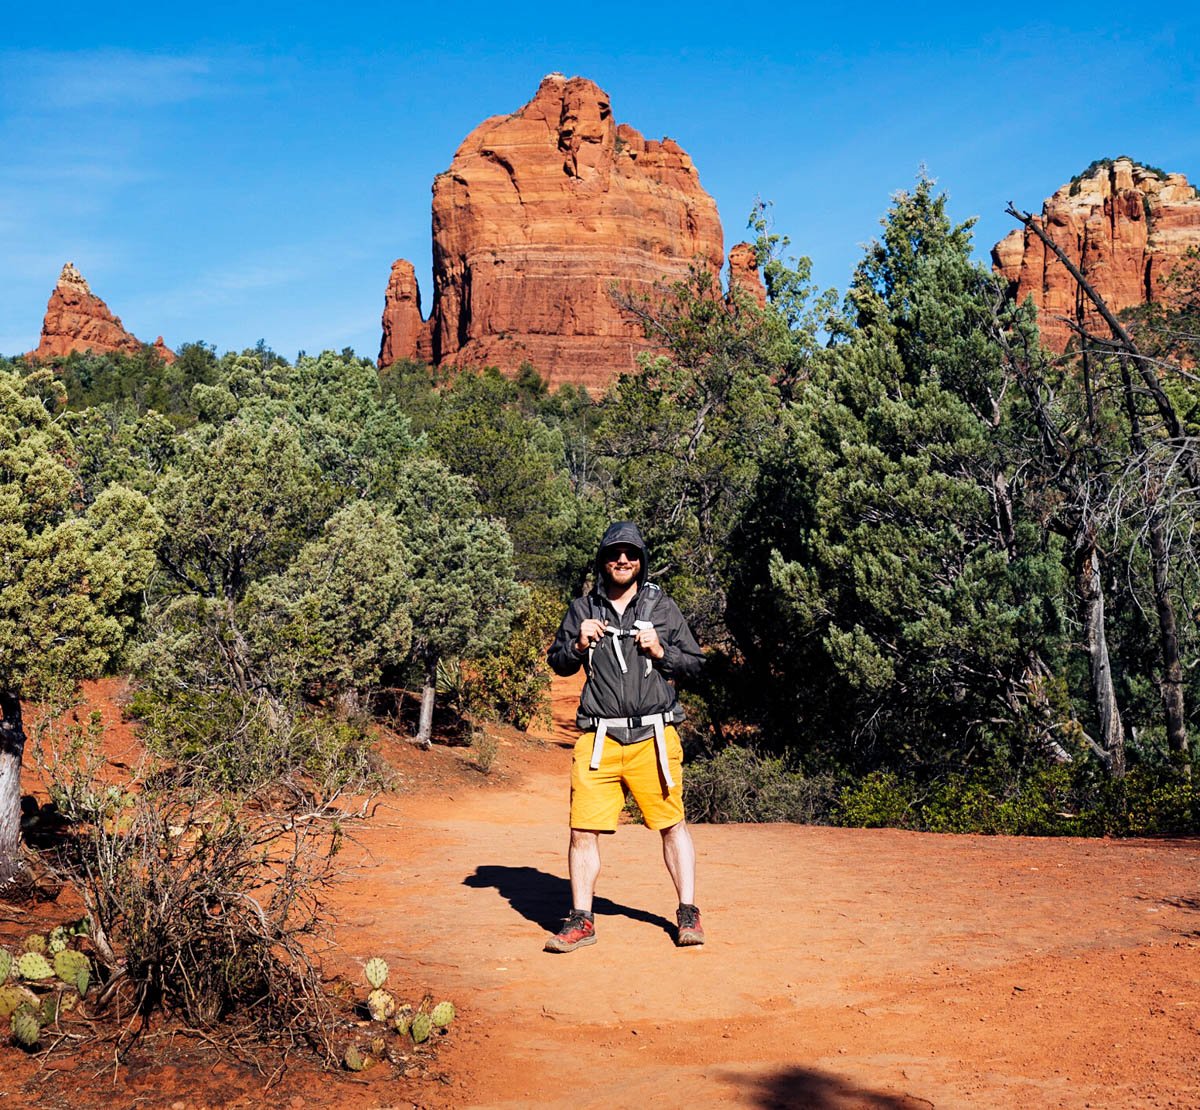
This trail is centrally located, within walking distance of some of Sedona’s residential areas, and yet, somehow isn’t super crowded. You’ll climb up and down a series of small hills (this would be a great path for trail running), through juniper trees and cacti.

Along the way, you’ll have a great vantage point of Thunder Mountain (thus the name!), Chimney Rock and Coffee Pot Rock, along with other red rock cliffs rising in the distance.
Tips for the Thunder Mountain Trail
Hike clockwise
This provides the best views of the valley.
This may not be the best trail if you’re looking to be immersed in nature
Similar to the Sugar Loaf Loop, you will see residential housing along part of the trail. Consider another trail if that isn’t your jam.
Hard hikes in Sedona
8. Cathedral Rock
Length
1.2 miles
Elevation gain
741 feet
Difficulty
Hard- while this trail is short, it’s also SUPER steep!
Fees
If you park in the lot, you will need to purchase a Red Rock Pass ($5/day or $15/week) or have an America the Beautiful pass, either of which will let you park at a number of other awesome Sedona trailheads.
Good for
Those who don’t mind heights or a bit of scrambling
Parking
There are two parking lots for the trail (the main parking lot and an overflow parking lot), which, in total, provide around 40 spots.
Given this trail’s popularity, it’s EXTREMELY challenging to snag one of these spots and, once they’re gone, you’re pretty much out of luck for parking. You’re not allowed to park along the road leading to the trail and there aren’t any places reasonably close to park and just walk there.
So we returned, arriving instead at the trailhead at 5:30 am (on a weekday) and were one of the last cars to snag a spot in the main parking lot. When we were leaving, we even saw a security guard literally blocking the entrance to prevent new cars from coming down the road to the lot. So again- I hope you don’t mind an early morning wake-up call!
When to visit
Since there’s panoramic views at the top, sunrise (you’ll likely see some hot air balloons floating past) or sunset are both good choices.

What to expect along the Cathedral Rock Trail
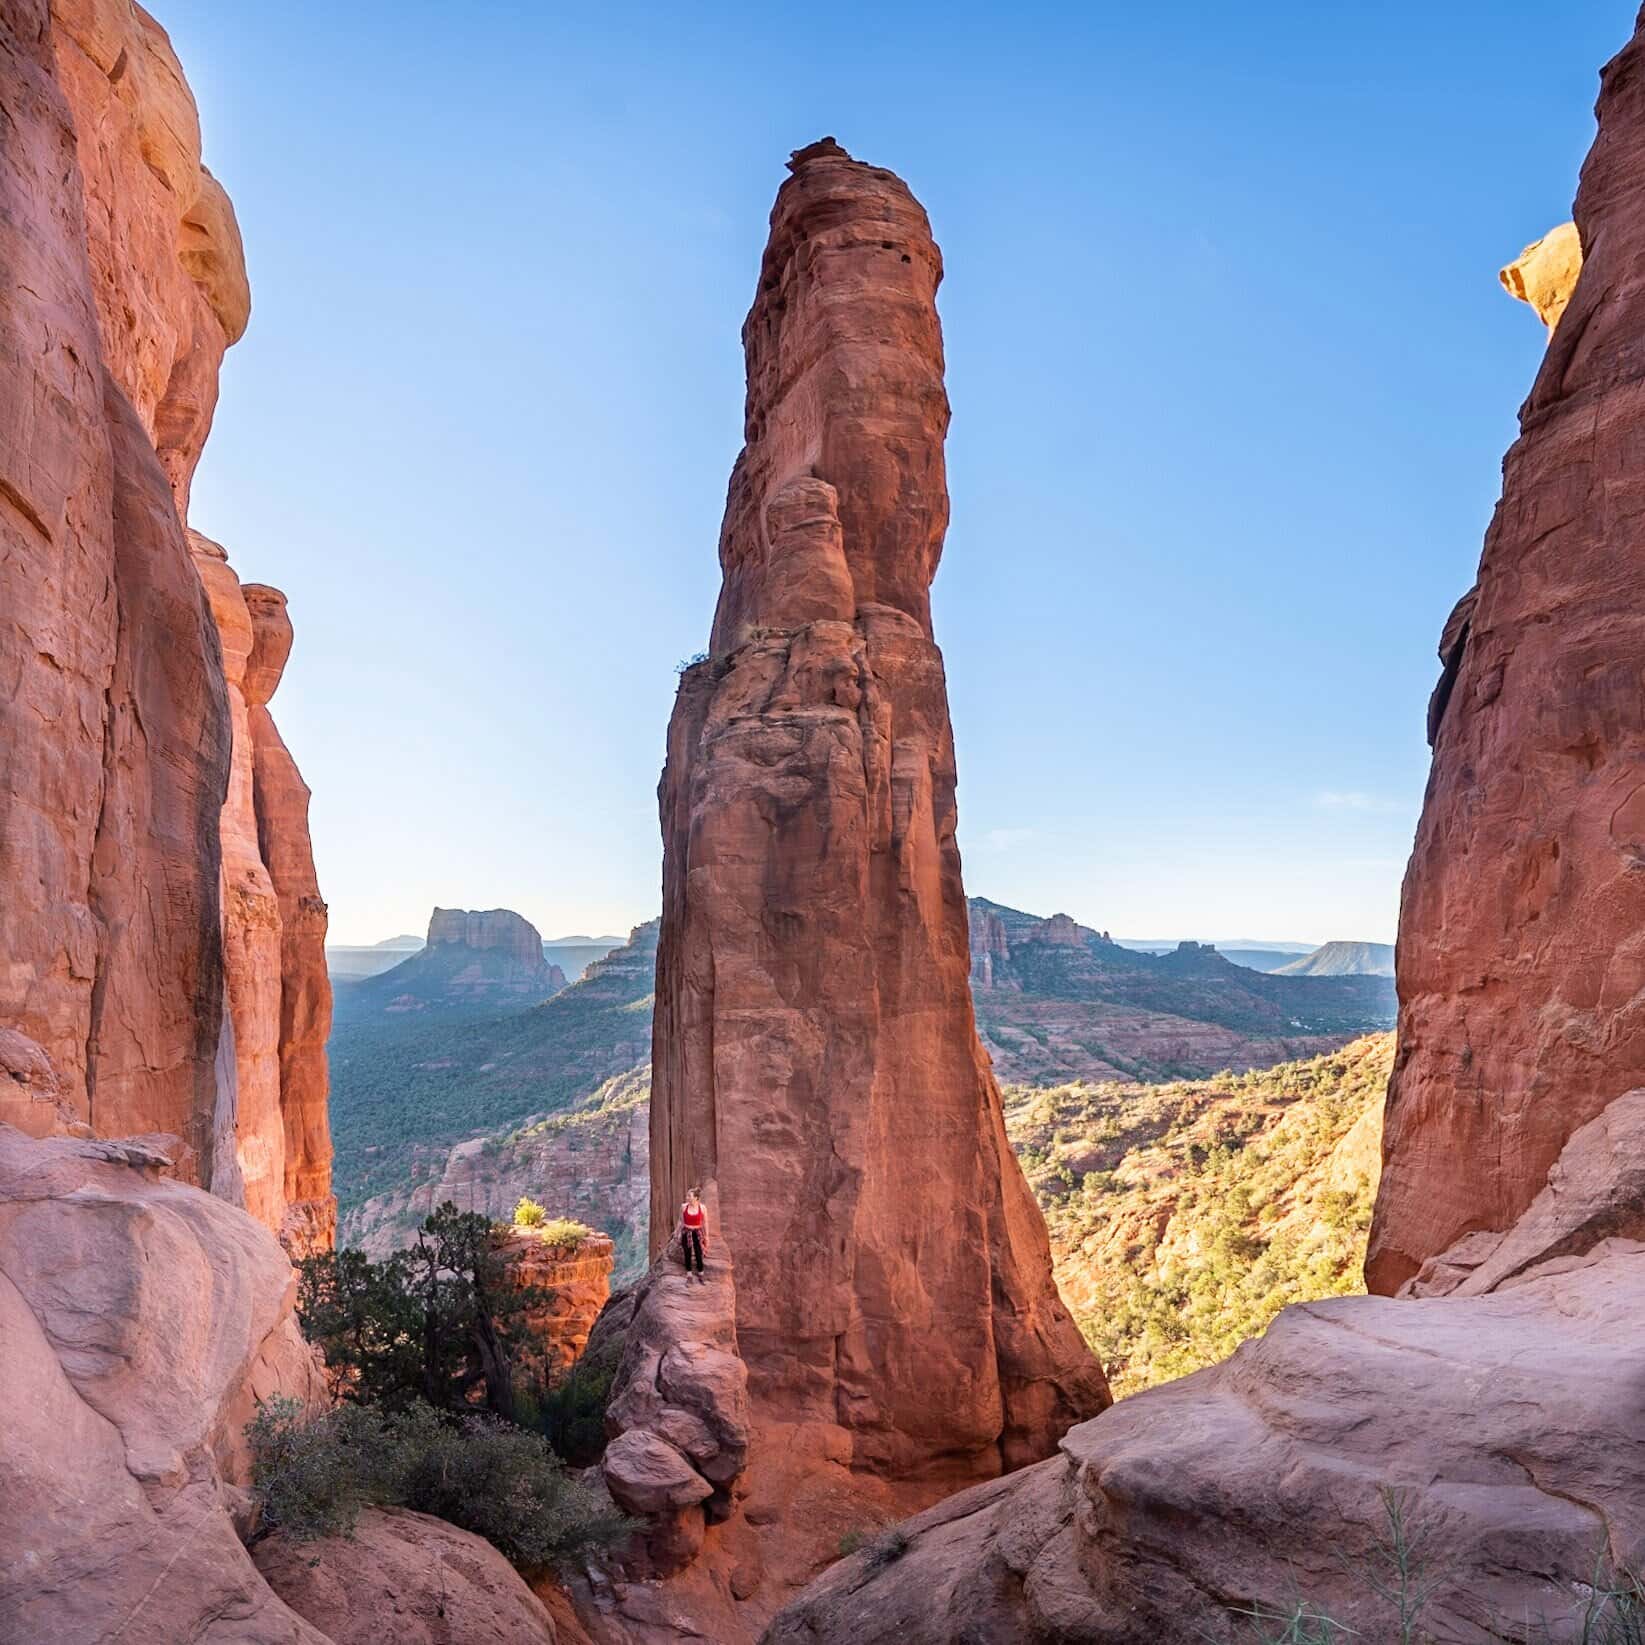
While Cathedral Rock is definitely one of the most popular hikes in Sedona, I wouldn’t say this trail is appropriate for all hikers.
It starts off deceptively easy, taking you across a dry wash and then a gently sloping sandstone hill upwards.
After a bit, however, you’ll reach a very steep gully that you’ll need to basically crawl up (on your hands and knees). This section is definitely the worst of the hike and we saw some folks turn around here (and remember- you’ll have to climb back down, which is usually worse than the way up!). That being said, it’s only about 100 feet long or so- so if you can get through that, the rest of the hike will be easy peasy!

Afterwards there’s a couple easier scrambling sections, but once you’re about 0.5 miles in, the pathway will turn into, well, an actual trail and you’ll be able to hike your way up switchbacks all the way to the top. The views from up there are inarguably some of the best in Sedona, providing sweeping views of the red cliffs rising up from the forest carpeting the floor below.
Tips for the Cathedral Rock Trail
Wear pants
Y’know what’s no fun? Scrambling up a sandstone mountain on your bare knees!
If you want to retain the skin on your knees, WEAR. PANTS. (I like these hiking pants for women and these ones for men). I saw some hikers in over-the-knee shorts and it just looked painful.

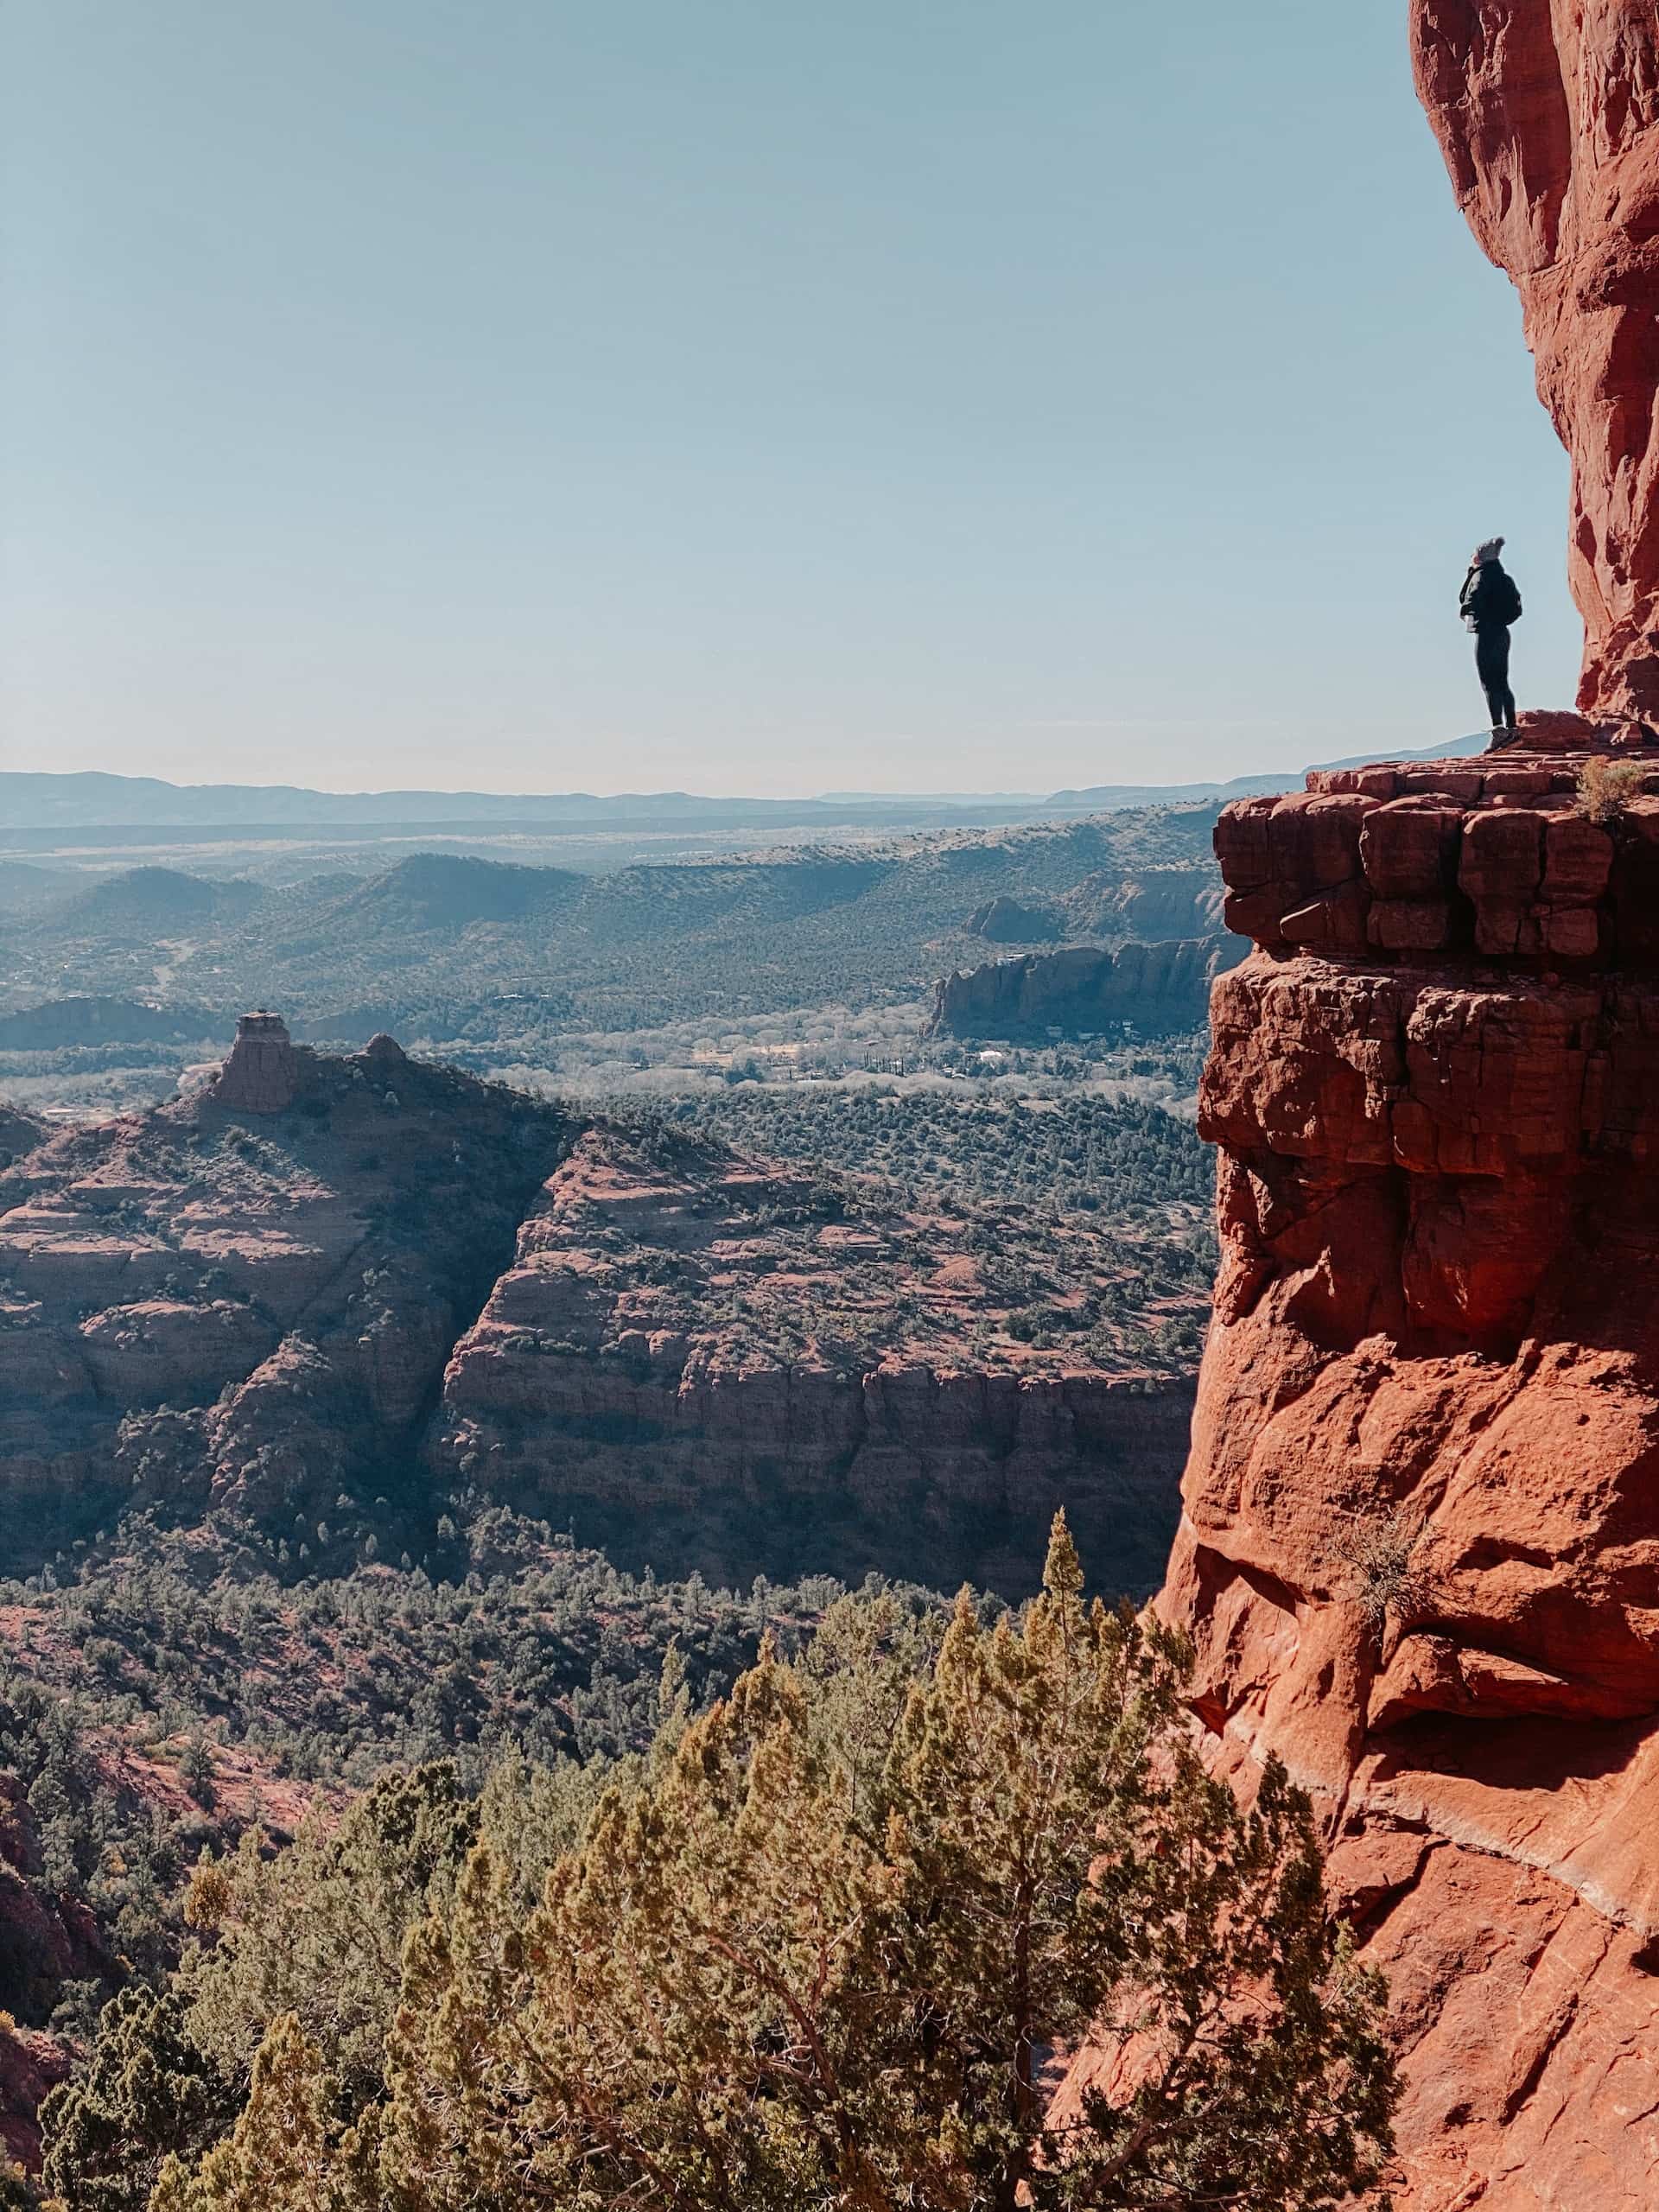
Explore beyond the main Cathedral Rock viewpoint
Once you reach the top, make sure to (carefully!) explore around a bit- Justin and I went off to the left of the sign greeting you for reaching the top of Cathedral Rock, and, after some more scrambling over rocks, found an absolutely BEAUTIFUL spot to watch the sunrise.
We had this view, totally to ourselves, for about an hour- so make sure to poke around the top and see if there’s any hidden viewpoints just waiting to be explored.
What should I know about Sedona and hiking there before visiting?
Sedona is a magical place- with the dreamy red rock landscapes and quirky New Age-y vibes, I leave a tiny piece of my heart there every time I have to leave this tiny town of just 10,000 residents. But I’m not the only one who loves visiting- over 3 million visitors swarm the town, Sedona’s hiking trails, and all of its tarot card readers on an annual basis.

The small town’s infrastructure has not kept pace with this explosion in tourism, which comes with its challenges. As mentioned above, parking, especially at trailheads (and even restaurants!) is very difficult; traffic can be a nightmare; and trails are often packed to the brim with hikers.
While you won’t be able to completely avoid these hurdles, here’s a couple things you can do to make your visit more pleasant:
Have a plan (and a backup plan)
If you haven’t picked up on this by now, Sedona isn’t really a great place to sleep in and lazily decide your hike du jour the day of.

To make the most of your visit, I’d recommend researching which trails you’d like to do (which, if you’re reading this, great start!), understanding what the parking situation is like there, and having a Plan B in case you can’t score a parking spot at your first choice.
Which leads me to my next point…
Get there early
Not to totally beat a dead horse, but getting to places first thing in the morning is honestly the BEST. You’ll have better chances at grabbing a parking spot, it’ll be way less crowded, you’ll have that dreamy golden hour light for photos, and you’ll miss the hottest part of the day!

Follow the Leave No Trace Principles
This isn’t true for all Sedona residents, but I have felt, at times, a bit unwelcome by locals. I have to imagine that it may be that a small portion of Sedona’s tourists aren’t super respectful to the town, its residents, and its beautiful land.
So friendly reminder that, while you’re visiting, to follow the Leave No Trace principles (whether you’re in the town itself or along the trail).

Plan ahead and be prepared
I covered this above, but make sure to know where you can and can’t park (and don’t park where you’re not allowed to), whether you need to have a pass at your trail of choice, and have a backup plan, just in case.

Beyond the logistics of where to park, though, knowing what to expect along your Plan A and Plan B trails is one of the most important hiking safety tips, so that you come prepared to the trail with sufficient hydration and the appropriate gear.
Travel and camp on durable surfaces
Stay on trail as often as you can to prevent unnecessary erosion and to protect Sedona’s beautiful but fragile desert flora. I’d recommend getting the free AllTrails app and following along the trail using the included trail maps) and to protect Sedona’s beautiful but fragile desert flora.

Dispose of waste properly
Don’t leave trash on the trail and if you bring your dogs along, please pick up after them (including their dog poo bags!).
Leave what you find
Take only pictures, leave only footprints. Refrain from carving your name, initials, or any other wisdom into the beautiful red rocks or disturbing any Native American artifacts that you may find along the trails in Sedona. You know, hopefully, common sense stuff.
Be considerate of others
Don’t park in front of people’s driveways, blast music on the trail, or otherwise be a jerky visitor.
Hopefully, if we all follow these tips, we can turn around the bad rap that visitors hiking in Sedona seem to have garnered.
There’s so many more great hiking options in Sedona, but these eight are some of my favorites. Have you tried hiking in Sedona? What are some of your favorite trails? Let me know in the comments below!


Thank you for reading our post! Check out our latest stories here and follow us on Instagram (@JustinAndJess_), YouTube, TikTok, or on Facebook to see what we’re up to next!
